(Added a tip for quickly and easily finishing the boss. Note that it's also possible to damage the black aristocrat this way, I haven't yet tried to kill him before he teleports to the floor.) |
No edit summary |
||
| (14 intermediate revisions by 11 users not shown) | |||
| Line 5: | Line 5: | ||
===Achievements=== |
===Achievements=== |
||
| + | {| class="wikitable" |
||
| − | * Secret 7/14 ([[Secret Locations|Sherlock Holmes Achievement]]) - Summon Phoenix Magick - Head east after fighting the waves of [[Goblin|Goblins]] and [[Troll#Cave Troll|Cave Trolls]] on a large bridge in Area 1. |
||
| + | | valign="top" | [[File:Ach_sherlock.jpg]] |
||
| ⚫ | |||
| + | | valign="top" | |
||
| ⚫ | * |
||
| + | '''Sherlock Holmes'''<br> |
||
| ⚫ | |||
| + | ''Find all [[Secret Locations|secret areas]] in the game.''<br> |
||
| ⚫ | |||
| − | * |
+ | * 7/14 - Summon Phoenix Magick - Head east after fighting the waves of [[Goblin|Goblins]] and [[Troll#Cave Troll|Cave Trolls]] on a large bridge in Area 1. |
| ⚫ | |||
| ⚫ | * 9/14 - [[Stung]] - Head to the southwest corner after entering the dark section of the mines with power generators in Area 3. Cast a spray of fire on the legs of the examinable platform that gives the message, "It looks wobbly..." to make it collapse into a bridge and follow it across the gap (or just Teleport across). Head north along the ledge to retrieve the sword next to a skeleton. Queued cold elements and cold sprays can provide bursts of light if you are having difficulty seeing. |
||
| ⚫ | |||
| + | |- |
||
| + | | valign="top" | [[File:Ach_moose.jpg]] |
||
| + | | valign="top" | |
||
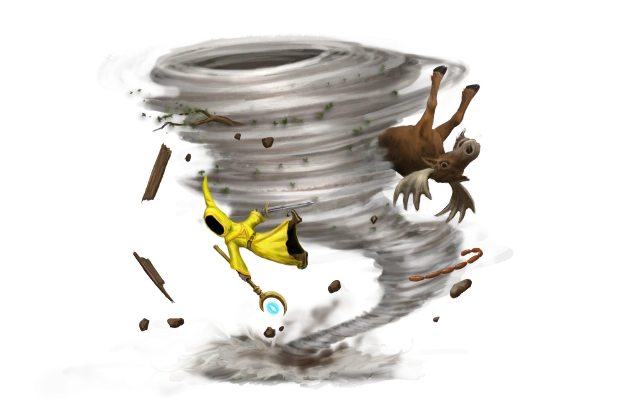
| + | '''King's Quest'''<br> |
||
| + | ''Find all the [[Moose Locations|moose]].''<br> |
||
| ⚫ | |||
| + | |- |
||
| + | | valign="top" | [[File:Ach aristocats.jpg]] |
||
| + | | valign="top" | |
||
| + | '''More like the Aristocats'''<br> |
||
| + | ''Defeat the Aristocrats.''<br> |
||
| + | Defeat [[The Aristocrats]] (boss) at the end of the chapter in Area 5. |
||
| + | |} |
||
| + | |||
===Magicks=== |
===Magicks=== |
||
| + | {| class="wikitable" |
||
| ⚫ | |||
| + | | valign="top" | [[File:Ach_robehat.jpg]] |
||
| ⚫ | |||
| + | | valign="top" | |
||
| + | '''I put on my robe and wizard hat'''<br> |
||
| + | ''Acquire all [[Magicks]] in adventure mode.''<br> |
||
| ⚫ | |||
| ⚫ | |||
| + | |} |
||
| + | |||
===Items=== |
===Items=== |
||
* Staves |
* Staves |
||
| Line 45: | Line 69: | ||
* A powerful Count lives there who is the only person that can help you reach [[Fafnir]] |
* A powerful Count lives there who is the only person that can help you reach [[Fafnir]] |
||
* A mine entrance is somewhere nearby |
* A mine entrance is somewhere nearby |
||
| − | Very encouraging! He leaves you after which a group of [[Goblin Warrior|Goblin Warriors]] and [[Goblin Archer|Goblin Archers]] will attack you across the bridge. Goblin Archers shoot arrows with fire compared to the regular [[Goblin Ranger]]. Moving past them, you will pass by a cave. Walk into it and find the |
+ | Very encouraging! He leaves you after which a group of [[Goblin Warrior|Goblin Warriors]] and [[Goblin Archer|Goblin Archers]] will attack you across the bridge. Goblin Archers shoot arrows with fire compared to the regular [[Goblin Ranger]]. Moving past them, you will pass by a cave. Walk into it and find the Thunder Storm Magick. It is hidden from direct view and located near the front of the cave. |
| − | {{Tip| |
+ | {{Tip|Thunder Storm ({{Elem|qf}}{{Elem|qf}}{{Elem|a}}{{Elem|s}}{{Elem|a}}+spacebar) is yet another weather affecting Magick which can only be used outdoors. Effectively a mix of Rain and Thunder Bolt, it will begin to rain both water and lightning from the skies, striking at random positions on the battlefield. Use with caution. Notice also that the element combination to cast Thunder Storm is also the exact same combination for the most damaging beam spell in the game. |
As you can expect, the Area Cast version is also the most damaging area spell but has a very small radius, thus {{Elem|qf}}{{Elem|a}}{{Elem|s}}{{Elem|s}}{{Elem|s}} is used instead for a larger radius with smaller damage by sacrificing the Steam and Lightning elements for more Arcane.}} |
As you can expect, the Area Cast version is also the most damaging area spell but has a very small radius, thus {{Elem|qf}}{{Elem|a}}{{Elem|s}}{{Elem|s}}{{Elem|s}} is used instead for a larger radius with smaller damage by sacrificing the Steam and Lightning elements for more Arcane.}} |
||
Moving forward past the next bridge (killing more Goblin Warriors and Archers) you will come across a bridge that is not drawn. Simply Teleport across or use a beam on the gear to its right to bring the bridge down. Just after the bridge is a checkpoint. Grab it and prepare for a large battle. |
Moving forward past the next bridge (killing more Goblin Warriors and Archers) you will come across a bridge that is not drawn. Simply Teleport across or use a beam on the gear to its right to bring the bridge down. Just after the bridge is a checkpoint. Grab it and prepare for a large battle. |
||
| − | Once you reach the middle of the large stone bridge immediately after the checkpoint, you will enter a gauntlet where goblins will attack from both sides of the bridge. It is best to stay |
+ | Once you reach the middle of the large stone bridge immediately after the checkpoint, you will enter a gauntlet where goblins will attack from both sides of the bridge. It is best to stay closer to the western side of the bridge because less enemies come from this side. Use a {{Elem|e}}{{Elem|e}}{{Elem|d}} on the far west side then just proceed to beam the enemies that come from the eastern side. This will give you plenty of distance to kill the eastern goblins before they reach you and not have to worry about the western ones. Then block the eastern side and kill the enemies on the west. In one of the waves, a [[Goblin Captain]] will also attack; he drops a [[Frost Cleaver]]. You will also encounter [[Cave Troll|Cave Trolls]] in the final waves, they move slowly so kill them with high damage beams or Thunder Bolts. |
| − | {{Warning|Do not let Goblin |
+ | {{Warning|Do not let Goblin Captains hit you! If they do, you will be [[Statuses|frozen]] locked forever because repeat swings of the Frost Cleaver they wield keep you frozen. If this happens to you, thaw yourself with a self-cast {{Elem|f}}.}} |
| − | After crossing the bridge take an immediate right where you will find the Summon Phoenix |
+ | After crossing the bridge take an immediate right where you will find the Summon Phoenix Magick next to the corpse of a [[Goblin Wizard]] in a large bird's nest. Return to the fork and go north to reach a checkpoint. There is another raised bridge with a Goblin Archer near it. Shoot at the round gear left of the bridge to lower it. Move across the bridge and a '''large''' wave of goblins will come after you. As you progress through this area, it is best to retreat to the other side of the bridge several times and simply beam them to death as they cross the chokepoint. Fireballs are also a good way to deal with the goblins as there are several Goblin Bombers in their midst. |
{{Tip|Summon Phoenix ({{Elem|w}}{{Elem|a}}{{Elem|f}}+spacebar) summons a Phoenix that lands at the caster's location, dealing Fire damage to everyone nearby and reviving all fallen wizards. This usually kills the casting wizard unless he is protected from Fire damage or moves away immediately after casting it.}} |
{{Tip|Summon Phoenix ({{Elem|w}}{{Elem|a}}{{Elem|f}}+spacebar) summons a Phoenix that lands at the caster's location, dealing Fire damage to everyone nearby and reviving all fallen wizards. This usually kills the casting wizard unless he is protected from Fire damage or moves away immediately after casting it.}} |
||
| Line 70: | Line 94: | ||
Then you can just backtrack to the northern chasm at the start of the level, Teleport north a few times to reach Area 4. If you choose not to Teleport directly to the exit and instead traverse the maze of platforms and bridges, the only new enemies are some [[Poison Spider|Poison Spiders]] and [[Giant Spider|Giant Spiders]]. They are not any more difficult to kill than Goblin Rogues back in [[Chapter One]]. |
Then you can just backtrack to the northern chasm at the start of the level, Teleport north a few times to reach Area 4. If you choose not to Teleport directly to the exit and instead traverse the maze of platforms and bridges, the only new enemies are some [[Poison Spider|Poison Spiders]] and [[Giant Spider|Giant Spiders]]. They are not any more difficult to kill than Goblin Rogues back in [[Chapter One]]. |
||
| + | |||
| + | {{Tip|This area is quite hard to see, and easier than you think to fall off. The best way to keep the darkness at bay is to enhance your sword (preferably arcane {{Elem|s}}) with any spell; the glow from the sword will be small, but it's better than nothing.You can also shoot lighting spells on the generators for more light.}} |
||
==Area 4== |
==Area 4== |
||
| Line 172: | Line 198: | ||
# Fire Nova ({{Elem|f}}{{Elem|f}}+Area) |
# Fire Nova ({{Elem|f}}{{Elem|f}}+Area) |
||
# Lighting Nova ({{Elem|a}}+Area) |
# Lighting Nova ({{Elem|a}}+Area) |
||
| − | # Arcane Bomb ({{Elem| |
+ | # Arcane Bomb ({{Elem|s}}{{Elem|d}}) |
# Water Beam ({{Elem|q}}{{Elem|s}}) |
# Water Beam ({{Elem|q}}{{Elem|s}}) |
||
# Healing Beam ({{Elem|w}}) |
# Healing Beam ({{Elem|w}}) |
||
| Line 186: | Line 212: | ||
Of course, you can also use other methods such as using mines, area stuns, beams (dangerous because of crossing against healing beams) etc. As 1,200 damage is easy to deal and the goblins tend to damage each other a lot, the possibilities are limitless. When the black robed cultist comes down, just make sure to target and kill it fast because killing the other cultists are a waste of time, they will just get revived. |
Of course, you can also use other methods such as using mines, area stuns, beams (dangerous because of crossing against healing beams) etc. As 1,200 damage is easy to deal and the goblins tend to damage each other a lot, the possibilities are limitless. When the black robed cultist comes down, just make sure to target and kill it fast because killing the other cultists are a waste of time, they will just get revived. |
||
| + | During a second play through of this area, entering the area with [[vortex]] queued is recommended. Casting vortex in the center of the arena as soon as possible will kill the three Aristocrats whom start there, as well as every Aristocrat to warp down to fight. |
||
{{Tip|An easy and quick way to beat the Aristocrats is to kill the cultists before they teleport down to the floor. This can be done with lightning attacks, for example ({{Elem|a}}{{Elem|a}}{{Elem|a}}{{Elem|a}}{{Elem|a}}). Distract the current cultist wave with shields while you kill the cultist audience. }} |
{{Tip|An easy and quick way to beat the Aristocrats is to kill the cultists before they teleport down to the floor. This can be done with lightning attacks, for example ({{Elem|a}}{{Elem|a}}{{Elem|a}}{{Elem|a}}{{Elem|a}}). Distract the current cultist wave with shields while you kill the cultist audience. }} |
||
| Line 194: | Line 221: | ||
|} |
|} |
||
| − | Once the boss is dead, pick up the [[Aristo-Staff]] dropped by the Black Aristocrat. Equipping it will make the remaining chapters of the game ''much'' easier because the staff reduces all damage by 75% (which in comparison is |
+ | Once the boss is dead, pick up the [[Aristo-Staff]] dropped by the Black Aristocrat. Equipping it will make the remaining chapters of the game ''much'' easier because the staff reduces all damage by 75% (which in comparison is better than the Staff of War which doubles your HP, effectively reducing all incoming damage by 50%). Make sure you are not standing near the northern stairs when the boss dies or you will trigger the level to end immediately, not allowing you to pick up the staff. Similarly, make sure the Black Aristocrat does not die near the northern stairs. |
The Aristo-Staff's active ability of Teleport, while not being useful since you can already cast it, does allow you to cast it while you are wet. Exit the chamber to reach [[Myrkur Swamp]] and continue your journey to seek the Count. |
The Aristo-Staff's active ability of Teleport, while not being useful since you can already cast it, does allow you to cast it while you are wet. Exit the chamber to reach [[Myrkur Swamp]] and continue your journey to seek the Count. |
||
{{WalkthroughNav}} |
{{WalkthroughNav}} |
||
| + | {{DEFAULTSORT:Chapter 08 (Magicka)}} |
||
| − | [[Category:Walkthrough |
+ | [[Category:Walkthrough (Magicka)]] |
[[Category:Strategies]] |
[[Category:Strategies]] |
||
Latest revision as of 02:50, 30 July 2020
Checklists[ | ]
These are listed in order of game appearance.
For visual support, refer to this video: http://www.youtube.com/watch?v=3RSwLgGNHXI
Achievements[ | ]

|
Sherlock Holmes
|

|
King's Quest
|

|
More like the Aristocats |
Magicks[ | ]

|
I put on my robe and wizard hat
|
Items[ | ]
- Staves
- Staff of Fire (Resistance to fire/Fire Immunity Aura) - See Secret 8/14 above.
- Goblin Staff (Increased Physical Resistance/Temporary Damage Immunity) - Drops from Goblin Wizards in Area 4.
- Staff of Invisibility (Invisibility) - See Secret 10/14 above.
- Aristo-Staff (Resistance to all elements/Teleport) - Drops from the final wizard in black robes in the Aristocrats boss fight in Area 5
- Weapons
- Frost Cleaver (Medium Physical/Freezes its target) - Drops from Goblin Captains throughout the chapter.
- Crowbar (Low Physical/Fast, Armor Piercing) - Leaning against a stack of crates outside the explosive-packed mine entrance at the end of Area 1
- Stung (Medium Physical/Fast, Glows when enemies are near) - See Secret 9/14 above.
Monsters and Bosses[ | ]
- Goblin Warrior - They carry distinctive red shields
- Goblin Archer - Their arrows have fire compared to the regular Goblin Ranger
- Goblin Captain - Their attacks freeze the target due to Frost Cleaver
- Cave Troll
- Goblin Bomber
- Goblin Miner
- Poison Spider
- Giant Spider
- Goblin Wizard
- The Aristocrats, High Lords of the Goblins (Boss)
Chapter Story[ | ]
Chapter 8 - The Mine Sweepers
The wizards once again set forth from [the] Castle Aldrheim. Again they headed northward, this time for the Járn Mines, which they were told was perfectly safe and long abandoned. As to be expected, this would prove not to be the case.
Area 1[ | ]
As you move to the first bridge, Future Vlad will inform you with his bat-like senses that
- Myrkur Swamp lies on the other side of the Járn Mines
- A powerful Count lives there who is the only person that can help you reach Fafnir
- A mine entrance is somewhere nearby
Very encouraging! He leaves you after which a group of Goblin Warriors and Goblin Archers will attack you across the bridge. Goblin Archers shoot arrows with fire compared to the regular Goblin Ranger. Moving past them, you will pass by a cave. Walk into it and find the Thunder Storm Magick. It is hidden from direct view and located near the front of the cave.

Moving forward past the next bridge (killing more Goblin Warriors and Archers) you will come across a bridge that is not drawn. Simply Teleport across or use a beam on the gear to its right to bring the bridge down. Just after the bridge is a checkpoint. Grab it and prepare for a large battle.
Once you reach the middle of the large stone bridge immediately after the checkpoint, you will enter a gauntlet where goblins will attack from both sides of the bridge. It is best to stay closer to the western side of the bridge because less enemies come from this side. Use a ![]()
![]()
![]() on the far west side then just proceed to beam the enemies that come from the eastern side. This will give you plenty of distance to kill the eastern goblins before they reach you and not have to worry about the western ones. Then block the eastern side and kill the enemies on the west. In one of the waves, a Goblin Captain will also attack; he drops a Frost Cleaver. You will also encounter Cave Trolls in the final waves, they move slowly so kill them with high damage beams or Thunder Bolts.
on the far west side then just proceed to beam the enemies that come from the eastern side. This will give you plenty of distance to kill the eastern goblins before they reach you and not have to worry about the western ones. Then block the eastern side and kill the enemies on the west. In one of the waves, a Goblin Captain will also attack; he drops a Frost Cleaver. You will also encounter Cave Trolls in the final waves, they move slowly so kill them with high damage beams or Thunder Bolts.
After crossing the bridge take an immediate right where you will find the Summon Phoenix Magick next to the corpse of a Goblin Wizard in a large bird's nest. Return to the fork and go north to reach a checkpoint. There is another raised bridge with a Goblin Archer near it. Shoot at the round gear left of the bridge to lower it. Move across the bridge and a large wave of goblins will come after you. As you progress through this area, it is best to retreat to the other side of the bridge several times and simply beam them to death as they cross the chokepoint. Fireballs are also a good way to deal with the goblins as there are several Goblin Bombers in their midst.
Just before you reach the entrance of the Járn mines in the far north, feel free to inspect the Crowbar that is leaning on some crates to the left. Then blow up the barrels of explosives with a Fire spell and enter the mines.
Area 2[ | ]
Upon entering area 2, Future Vlad appears again and repeats his message about traveling through the mines to reach Myrkur Swamp. For some reason, he is very confident that the Count will be able to help you. Moving forward, you will meet some Goblin Archers and Goblin Miners. Finish them off and keep moving. When you come to the part with the bridge (assuming you blew up the bridge accidentally), Teleport across the chasm and on the north side you will find the Staff of Fire. Return across the chasm, burn down the wooden gate to the north (or Teleport past it) and move into the next area.
Area 3[ | ]
This part of the mines is extremely dark and large. You can go immediately north until you reach the chasm, Teleport north and run north to find the exit of Area 3 (but you will miss a Sherlock Holmes secret if you do this).
Otherwise, go west once you reach the first wooden bridge and just proceed going west until you come to the power generator (you can turn them on with lightning spells to switch on lights in the area). Once you reach the power generator, there will be a path on the far left. Take this path to a wobbly wooden construction standing by the chasm guarded by a few goblins. Cast a fire spray at the structure and it will fall creating a bridge (or just Teleport across) up to the weapon Stung (Secret 7).
Then you can just backtrack to the northern chasm at the start of the level, Teleport north a few times to reach Area 4. If you choose not to Teleport directly to the exit and instead traverse the maze of platforms and bridges, the only new enemies are some Poison Spiders and Giant Spiders. They are not any more difficult to kill than Goblin Rogues back in Chapter One.
Area 4[ | ]
Upon entering Area 4, you will meet a Goblin Wizard and a group of Goblin Miners and Archers. Goblin Wizards wear gray robes and are not very threatening:
- Casts a weak
 beam
beam - Casts a weak beam instead if it gets wet while queueing up the above beam
- Drys itself with if it is wet
- Pushes you away (and wets you) with a spray if you are in melee range
- Heals itself with if it has taken damage
Chain lightning-fire the entire group of them with ![]()
![]()
![]()
![]()
![]() or use your strongest area damage spells. Goblin Wizards drop the Goblin Staff. Continue forward on the left fork to find a moose (Moose 8). Go across the chasm on the right fork to find the next checkpoint. Just above the checkpoint, Teleport up to the ledge where a Staff of Invisibility is lying (its where the complex maze of narrow wooden bridges lead to, and you can't actually reach the maze of bridges without using Teleport anyway).
or use your strongest area damage spells. Goblin Wizards drop the Goblin Staff. Continue forward on the left fork to find a moose (Moose 8). Go across the chasm on the right fork to find the next checkpoint. Just above the checkpoint, Teleport up to the ledge where a Staff of Invisibility is lying (its where the complex maze of narrow wooden bridges lead to, and you can't actually reach the maze of bridges without using Teleport anyway).
If you blew up the bridge just next to the checkpoint, Teleport across it (or walk the longer detour to the left) and continue north where you will find a locked door. Immediately after seeing it, channel your strongest beam at the lock, because a large groups of goblins will begin to attack you. You should be able to destroy the lock before they reach you. Continue north into Area 5. If you remain behind, several more waves of enemies will come consisting of a mixture of Cave Trolls, Goblin Warriors, Goblin Bombers, Goblin Captains, Goblin Miners and Goblin Archers.
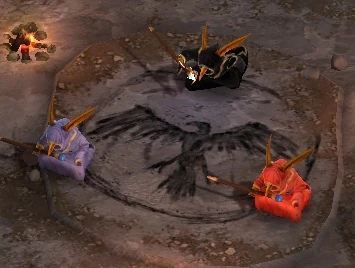
Area 5 - Aristocrats[ | ]
You will come upon a large circular chamber where the High Lords of the Goblins are gathered. The leader is robed in black and declares that their treasure must be protected.
|
The Aristocrats, High Lords of the Goblins
The Aristocrats is an assembly of goblin cultists robed in various colors that indicate their primary elemental strength. There are 4 colors not including the black. These specialized cultists are much weaker than the standard Goblin Wizard in gray robes (encountered earlier in the previous area or in Chapter Six during Grimnir's mind duel). They only have 1,200 hitpoints rather than the 3,000 that Goblin Wizards have. To make up for it, they will attack in groups of two to four cultists at a time. There are a total of 8 waves of goblin cultists to fight:
The following table shows their abilities:
Since the goblin cultists only have 1,200 hitpoints and always teleport to the middle, to beat this encounter, simply run to the middle of the room and cast your favorite Area damage spell (such as Of course, you can also use other methods such as using mines, area stuns, beams (dangerous because of crossing against healing beams) etc. As 1,200 damage is easy to deal and the goblins tend to damage each other a lot, the possibilities are limitless. When the black robed cultist comes down, just make sure to target and kill it fast because killing the other cultists are a waste of time, they will just get revived. During a second play through of this area, entering the area with vortex queued is recommended. Casting vortex in the center of the arena as soon as possible will kill the three Aristocrats whom start there, as well as every Aristocrat to warp down to fight.
Defeating The Aristocrats will complete the "More like the Aristocats" achievement. | ||||||||||||||||||||||||||||||||||||||||
Once the boss is dead, pick up the Aristo-Staff dropped by the Black Aristocrat. Equipping it will make the remaining chapters of the game much easier because the staff reduces all damage by 75% (which in comparison is better than the Staff of War which doubles your HP, effectively reducing all incoming damage by 50%). Make sure you are not standing near the northern stairs when the boss dies or you will trigger the level to end immediately, not allowing you to pick up the staff. Similarly, make sure the Black Aristocrat does not die near the northern stairs.
The Aristo-Staff's active ability of Teleport, while not being useful since you can already cast it, does allow you to cast it while you are wet. Exit the chamber to reach Myrkur Swamp and continue your journey to seek the Count.
| |||||||||||