(Add checklists) |
No edit summary |
||
| (35 intermediate revisions by 16 users not shown) | |||
| Line 1: | Line 1: | ||
| − | {{cleanup|reason=First person POV, add element template}} |
||
==Checklists== |
==Checklists== |
||
These are listed in order of game appearance. |
These are listed in order of game appearance. |
||
| + | |||
| + | For visual support, refer to this video: http://www.youtube.com/watch?v=TFREIFYBT2I |
||
| + | |||
===Achievements=== |
===Achievements=== |
||
| + | {| class="wikitable" |
||
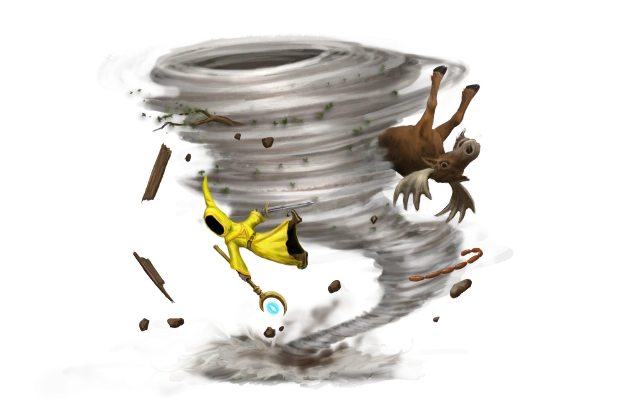
| ⚫ | |||
| + | | valign="top" | [[File:Ach_moose.jpg]] |
||
| ⚫ | |||
| + | | valign="top" | |
||
| ⚫ | |||
| + | '''King's Quest'''<br> |
||
| ⚫ | |||
| + | ''Find all the [[Moose Locations|moose]].''<br> |
||
| ⚫ | |||
| + | |- |
||
| + | | valign="top" | [[File:Ach_sherlock.jpg]] |
||
| + | | valign="top" | |
||
| + | '''Sherlock Holmes'''<br> |
||
| + | ''Find all [[Secret Locations|secret areas]] in the game.''<br> |
||
| ⚫ | |||
| + | |- |
||
| + | | valign="top" | [[File:Ach hawking.jpg]] |
||
| + | | valign="top" | |
||
| + | '''I call it a Hawking Hole'''<br> |
||
| + | ''Make 50 enemies get sucked into the same Vortex.''<br> |
||
| ⚫ | |||
| + | |- |
||
| + | | valign="top" | [[File:Ach king.jpg]] |
||
| + | | valign="top" | |
||
| + | '''Saved by the king'''<br> |
||
| + | ''Defeat the Warlock and Machine.''<br> |
||
| ⚫ | |||
| + | |} |
||
| + | |||
===Magicks=== |
===Magicks=== |
||
| + | {| class="wikitable" |
||
| ⚫ | |||
| + | | valign="top" | [[File:Ach_robehat.jpg]] |
||
| ⚫ | |||
| + | | valign="top" | |
||
| + | '''I put on my robe and wizard hat'''<br> |
||
| + | ''Acquire all [[Magicks]] in adventure mode.''<br> |
||
| ⚫ | |||
| ⚫ | |||
| + | |} |
||
| + | |||
===Items=== |
===Items=== |
||
* Staves |
* Staves |
||
| − | ** Shield Staff (Increase the rate at which shields are boosted/Immediately cast a self shield) - Inside the closet beside the door of your inn room as you wake to the town falling under siege in Area |
+ | ** [[Shield Staff]] (Increase the rate at which shields are boosted/Immediately cast a self shield) - Inside the closet beside the door of your inn room as you wake to the town falling under siege in Area 2. |
| − | ** Staff of War (Physical Resistance Aura, Doubles HP/Arcane Bolt) - Dropped from a [[Disciple]] in the |
+ | ** [[Staff of War]] (Physical Resistance Aura, Doubles HP/Arcane Bolt) - Dropped from a [[Disciple]] in the market in Area 3, or from the Disciples during [[The Machine]] boss encounter in Area 7. |
* Weapons |
* Weapons |
||
| − | ** Mjölner (Medium Physical/Slow, Lightning strikes target on hit) - Hanging above the second door on the left as if it were a sign in Havindr just after entering the city in Area 1. |
+ | ** [[Mjölner]] (Medium Physical/Slow, Lightning strikes target on hit) - Hanging above the second door on the left as if it were a sign in Havindr just after entering the city in Area 1. |
| + | ** [[Captain's Axe]] (Medium Physical) - Dropped by [[Admiral Agnar]] if you murder him just before entering the inn in Area 1, or if you murder him again in the market in Area 3. |
||
| − | ** Warhammer (Medium Physical/Pushes target back) - See Secret 6/14 above. |
+ | ** [[Warhammer]] (Medium Physical/Pushes target back) - See Secret 6/14 above. |
| − | ** Gungnir (Medium Physical/Slow, ranged, armor piercing) - Propped against a market stall on the northwest side of the town square in Area 1 |
||
| − | ** |
+ | ** [[Gungnir]] (Medium Physical/Slow, ranged, armor piercing) - Propped against a market stall on the northwest side of the market in Area 3. |
| + | ** [[Blade of Chill]] (Medium Physical and Cold/Slow, creates a cold blast in front of wielder) - Left of where the Town Grinder breaks through a wall, behind a fire and pile of debris in Area 5. |
||
===Monsters and Bosses=== |
===Monsters and Bosses=== |
||
| − | * [[Goblin Rogue]] |
+ | * [[Goblin Rogue]] (Pirate version) |
* [[Goblin Bomber]] |
* [[Goblin Bomber]] |
||
* [[Orc Scout]] |
* [[Orc Scout]] |
||
| Line 33: | Line 65: | ||
==Area 1== |
==Area 1== |
||
| − | Finally made it Havindr! |
+ | Finally made it Havindr! Head west off the road immediately where you will you see yet another crashed airship. The Tornado magick is hidden amongst the trees next to the southern side of the ship. Continue north after picking it up, but turn left at the fork instead of going straight to the gate. To the north of the airship is another dead moose (Moose 5). What's up with all these dead mooses? Er... moose? Meese? |
| + | Now go back to the gates to trigger a short cutscene of the city gates opening. Enter the city. If you talk to the first person inside the city, he tells you that he saw a tall pale man with long black hair walk out of the wreckage unscathed. Hmmm... Who can that be? Don't worry about checking any of the doors, they are all locked. But there is one building near the city gates with a sign that looks like a hanging hammer (next to a woman in blue); it turns out that the hammer is actually [[Mjölner]] so grab it if you want it! |
||
| − | Now go back to the gates to trigger a short cutscene of the gates openning. |
||
| + | Then just continue following the road north until you trigger a cutscene where [[Admiral Agnar]] along with a troop of soldiers runs over to meet you. He says that [[The King]] cannot meet you today and advises you to rest in the inn next to him. Walk into the open inn door since you can do little else. Well, I suppose you could murder Admiral Agnar if you really want a [[Captain's Axe]]. |
||
| − | Don't worry about checking any of the doors, they are all locked. But there is one building with a [http://imgur.com/yeSh8 sign that looks like a hanging hammer]; it turns out that the hammer is actually Mjölner so grab it if you want it! |
||
| ⚫ | |||
| − | Then just continue following the road north until you trigger a cutscene, then head into the open door to the inn above you to trigger another quick cutscene showing you the city is under attack |
||
| + | While you are resting, a meteor crashes into the inn and wrecks part of your room. |
||
| − | When you regain control, open the |
+ | When you regain control, open the cabinet next to the exit to get the [[Shield Staff]] (which allows you to boost shields faster or cast a self shield immediately), then toss the staff because it is not very useful, then head out and let the battle begin! |
| + | {{Tip|Healing spells and healing mines can boost shields much faster than spamming spacebar can.}} |
||
| ⚫ | |||
| ⚫ | |||
| − | Fight off the waves of enemies at the bridge, then head east to trigger a cutscene. |
||
| ⚫ | Once outside the inn, head east to the bridge killing the [[Goblin Rogue|Goblin Rogues]] and [[Goblin Bomber|Goblin Bombers]] on the way. Once you get to the bridge you will meet a new enemy, the [[Orc Scout]]. The Orc Scout is stronger than the average goblin, but it's nothing to fret over. They have a special ability to latch onto you and start biting you, so be sure to spam the key you bound to Boost to break free. The Orc Scout also has an interesting behavior: they shake themselves dry like a dog if they get wet. |
||
| + | Fight off the waves of enemies at the bridge, then head east to trigger a cutscene. A familiar figure in a black cloak appears and warns you about enemy warlocks ahead. Right after this, head north at the fork in the road to reach a secret area (Secret 6) with a [[Warhammer]]. Return to the fork and head east to market. Admiral Agnar is there and yells "IT'S A TARP" before waves of Orc Scouts, Goblin Rogues and Goblin Bombers attack. Before the final wave, a [[Disciple]] makes a grand entry. |
||
| − | Here is another fork in the road, head north to get to a small secret area with a Warhammer ([http://imgur.com/XLxPu Sherlock Holmes 6]). |
||
| + | Disciples are resistant to physical damage (there's a white aura around their feet) because of the [[Staff of War]] they are holding and they have the following attacks: |
||
| − | When you've nabbed that, return to the fork and head east to town square. Here you will fight a few waves of enemies including orcs, goblins, and goblin bombardiers. The final enemy will be your first [[Disciple]]. |
||
| + | # Shoots Arcane beams ({{Elem|s}}). |
||
| + | # Shoots Life bolts ({{Elem|w}}+{{Elem|d}}) to heal nearby allies |
||
| + | # Shoots Water bolts ({{Elem|q}}+{{Elem|d}}) like the Druids to do an area knockback. |
||
| + | # Shield themselves constantly with {{Elem|e}}. |
||
| + | {{Tip|As the disciple's main attack is through arcane magic, casting an arcane shield ({{Elem|s}}+{{Elem|e}} will greatly reduce damage from him.}} |
||
| − | Disciples love to shield themselves and shoot Arcane beams or Lifebolts ([[File:element_life.png]]+[[File:element_earth.png]]), as well as waterbolts like the Druids. They will also shield themselves consistently with [[File:element_shield.png]]. They are also resistant to physical damage because of their staff. |
||
| + | {{Warning|Do not use beam attacks on the Disciple unless he is knocked down on the floor or stunned. Crossing beams with the Disciple will more than likely get you killed.}} |
||
| + | Pick up the [[Staff of War]] dropped by the Disciple after the battle ends. It doubles your max HP and gives you physical resistance, very good for the solo player. Other objects of interest include the [[Captain's Axe]] dropped by the dead Admiral Agnar and a [[Gungnir]] propped against a market stall on the northwest side. Gungnir is a ranged throwing spear. |
||
| + | Continue east to the next area. |
||
| − | The [[Staff of War]] Disciples drop are very nice: it doubles your max HP and gives you physical resistance, very good for the solo player. |
||
| + | ==Area 4== |
||
| − | After defeating the Disciple continue east to the next area. |
||
| ⚫ | Douse the fires blocking your way with water spells or Rain. Continue eastward and you will trigger a cutscene. A Town Grinder crashes through the northern wall and the three soldiers yell "FREEEEEDOM!" (watched Braveheart?) and suicide themselves on the whirling blades. After this, go up and around the debris you had just doused to the left to get the [[Blade of Chill]] laying against the side of the building. |
||
| ⚫ | |||
| ⚫ | |||
| ⚫ | Douse the fires with water spells or |
||
| ⚫ | As a fun alternative to damage spells, knockback spells such as {{Elem|q}} can be used to great effect here by pushing enemy orcs into the whirling blades. If the orcs are successfully pushed into the blades they will be diced into gibbets instantly. Be careful, however, as Orc Berserkers are more resistant to knockback than previous enemies and will only be pushed with multiple {{Elem|q}} elements in the same spell. |
||
| ⚫ | |||
| ⚫ | |||
| ⚫ | As a fun alternative to damage spells, knockback spells such as |
||
| + | ==Area 5== |
||
| ⚫ | |||
| + | Douse fires as you progress through the building. You will eventually come across the Conflagration Magick. However, once you get near this Magick, your first [[Orc Warrior]] will spawn at the nearby doorway. These guys have lots of health, are armored, and do a charge attack. |
||
| + | {{Tip|1=The Orc Warrior is the first enemy with multiple stages of hitpoints. Specifically, it has 250+2200+2200 hitpoints. When you deal 250 damage to it, its iron shield is destroyed and its in-game model downgrades to an Orc Warrior without a shield but is still armored. Do another 2200 damage to it and its body armor is destroyed and its in-game model downgrades again to one without the armor. It even moves faster (from speed 3 to 7 which is the same as an Orc Scout) once this happens. Doing the final 2200 damage will kill it. |
||
| − | Douse fires as you progress through the building, you will eventually come across the [[Conflagration]] magick which is perfect for use against large groups of goblins that have bombardiers dispersed throughout. Once you get near this magick, however, your first [[Orc Warrior]] will spawn. These guys have lots of health, are armored, and do a charge attack. You can remove their shields by casting at least slightly charged up arcane bolt attacks ([[File:element_earth.png]]+[[File:element_arcane.png]]). Keep in mind that any type of electrical attacks will bypass their shield (Lightning Bolt is useful here, as it will usually strike them first). When you've taken care of him, head east and out of the door on the south side of the building, taking out the additional orcs inside if you so choose. Then head east to move to the next area. |
||
| + | The shield will block most magic and must be destroyed either with a high damage spell, such as thunderbolt {{Elem|steam}}{{Elem|lightning}}{{Elem|arcane}}{{Elem|lightning}} or meteorite {{Elem|earth}}{{Elem|earth}}{{Elem|earth}}{{Elem|earth}}{{Elem|earth}}; or more easily by using a steam spell {{Elem|steam}} before it becomes vulnerable to damage. While the shild may have been destroyed, it will still take reduced damage from spells until its armour has been destroyed; but thunder magic will do increased damage because it will boil them in their own armor. |
||
| + | These three pictures illustrate the three stages of the Orc Warrior: |
||
| + | <div style="text-align: center;">[[File:Orc_Warrior.png|x141px|]] [[Image:Orc_warrior_noshield.png|x141px]] [[Image:Orc_warrior_noarmor.png|x141px]]</div>}} |
||
| + | When you've taken care of him, head east and out of the door on the south side of the building, taking out the additional Orc Scouts inside if you so choose. Then head east to move to the next area. |
||
| − | ==Area |
+ | ==Area 6== |
| − | Head |
+ | Head northeast and you will find a group of goblins and orcs with Goblin Bombers interspersed; this is a great time to try out your new Conflagration Magick if you want! |
| + | {{Tip|Conflagration ({{Elem|fq}}{{Elem|f}}{{Elem|fq}}{{Elem|f}}{{Elem|fq}}+spacebar) essentially conjures a heat wave towards the direction the caster is facing. Anyone caught in the heat wave takes 600 fire damage and catches on fire. This will also light up Grease patches on the floor and blow up any Goblin Bombers and bombs left behind by them.}} |
||
| − | Continue heading north east, fighting orcs along the way until you get to the Checkpoint. |
||
| + | Continue heading northeast, fighting orcs along the way until you get to the checkpoint. Moving forward from here, the guards inform you that the orcs have captured [[The King]] and barricaded the door to his castle. The good news is, they have decided to use the gunpowder shipment you delivered to blow up the door. The bad news? The fuse takes 3 minutes to burn. Waves and waves of all the enemies you have seen in this chapter will continually come in from the sides to assault you. |
||
| + | You have four options: |
||
| − | Moving forward from here will put you into a large defensive fight with lots of friendly NPCs while waiting for a fuse to detonate bombs. So prepare anything you want like resistances, shields, and enchantments, then move forward. |
||
| + | # Choose to attack profusely while you wait for 3 minutes; |
||
| + | # Choose to heal your friendly NPCs while you wait for 3 minutes; |
||
| + | # Cast an AoE shield and keep boosting it for 3 minutes; |
||
| + | # Or detonate the charges instantly by casting a fire spell on it (the base of the door). |
||
| + | {{Tip|You can get the "I call it a Hawking Hole" achievement here on your second playthrough with the Vortex Magick (obtained in [[Chapter Twelve]]). Don't blow up the charges, kill all the friendly soldiers first, then cast Vortex in the middle of the city square and run in large circles around it. As long as an enemy walks into it, the duration of the vortex will be extended for another 10 seconds. If you get sucked in accidentally, quickly Teleport (obtained in Chapter [[Seven]]) out. You can also shoot an earth pebble ({{Elem|d}}) into a Vortex to extend its duration.}} |
||
| − | You will be facing all of the enemy types you have seen in this level in waves. You can choose to attack profusely or stay back and heal your friendly NPCs while you wait for the charges to detonate. |
||
| ⚫ | |||
| + | ==Area 7== |
||
| − | NOTE: if you don't want to bother with the fight, just cast a fire spell on the bombs to detonate them immediately. |
||
| + | As you enter the room, you will be confronted by a scene where [[The King]] is about to be drilled to death. |
||
| + | {| style="width: 100%; background: #111111" |
||
| ⚫ | |||
| + | |- |
||
| + | | style=" padding: 5px; width: 33%; background: #FFF; border: 1px solid #ccc; vertical-align: top;" | |
||
| + | <div style="background: #efc466; border:1px solid #ccc; border-bottom:4px groove #999999; border-right:4px groove #999999; padding: 5px; margin: 3px; font-weight: bold; text-align: center; font-size: 120%;">The Machine and the Warlock</div> |
||
| + | {{Monster |
||
| ⚫ | |||
| + | | image = [[File:The_machine.png|179px]] |
||
| − | The first stage of this boss is simply destroying the machine within a certain amount of time. I've found that one of the quickest ways is just to aim your most powerful spell at the wooden contraption just to the right of where the blueprint is hanging on the south side. |
||
| + | | imagecaption = The Machine |
||
| + | | Name = The Machine |
||
| + | | MHP = 5000 |
||
| + | | Species = Structure |
||
| + | | appearance = Wooden contraption with a drill |
||
| + | | weaknesses = ? |
||
| + | | regen = ? |
||
| + | | speed = ? |
||
| + | | turn = ? |
||
| + | | score = ? |
||
| + | }} |
||
| + | |||
| + | [[The Machine]] is a wooden contraption with a drill designed to torture [[The King]]. It is operated by an orc pedaling a bicycle on its platform to advance the position of the drill. You need to kill the orc before the drill kills The King. During the fight, two [[Disciple|Disciples]] will enter from the doorway in the northeast. If you kill either or both of them, more Disciples come through the door to keep the number of Disciples at two. |
||
| + | |||
| + | {{Tip|This is the easiest spot to get the "I call it a Hawking Hole" achievement. Since the Disciples will constantly spawn to keep the number of Disciples at two, if you drop a Vortex in front of the door when one is about to spawn, any others that spawn will get pulled into the Vortex triggering more to spawn. It is best to do this after you have destroyed The Machine, because if you do it in the beginning, The Machine will kill The King before you get the 50 kills required unless you use cold or freeze the orc powering the machine.}} |
||
| + | Use any means you like to damage the orc on The Machine while dodging the two Disciples. Some methods are: |
||
| + | # Use Grease ({{Elem|q}}{{Elem|d}}{{Elem|w}}) on the orc and light it up with fire then run around the machine. |
||
| + | # Hide behind The Machine on the left side then spam {{Elem|s}} Area of Effect by holding shift. |
||
| + | # Stand below the orc and raise a hemisphere shield to deflect the two Disciples, then kill the orc with beam spells. |
||
| + | # Stand beside the machine, cast bubble shield, charge it up and then use steam-arcane-lighting beam ({{Elem|fq}}{{Elem|fq}}{{Elem|a}}{{Elem|s}}{{Elem|a}}) on The Machine. |
||
| + | |||
| + | You have two minutes to destroy The Machine before it kills The King. |
||
| + | |||
| + | {{-}} |
||
| + | {{Monster |
||
| + | | image = [[File:Boss_Warlock.png]] |
||
| + | | imagecaption = Warlock |
||
| + | | Name = Jotunn |
||
| + | | MHP = 12000 |
||
| + | | Species = Human |
||
| + | | appearance = A disciple in dark purple robes |
||
| + | | weaknesses = Unknown |
||
| + | | regen = 0 |
||
| + | | speed = 4 |
||
| + | | turn = 5 |
||
| + | | score = 70 |
||
| + | }} |
||
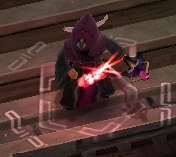
| + | After destroying The Machine, the [[Warlock]] boss himself will approach you. He is exactly like the regular Disciples but has more hitpoints. See Area 3 above for the list of Disciple attacks. |
||
| + | |||
| + | An effective way to defeat the Warlock is to hide behind The Machine on the left, wait for them to run around the corner to you, cast an area stun ({{Elem|r}}{{Elem|d}}{{Elem|d}}{{Elem|d}}{{Elem|d}}), then cast a couple of area damage spells ({{Elem|qf}}{{Elem|s}}{{Elem|a}}{{Elem|a}}{{Elem|a}}) to finish them off. Also, fire is very effective against the machine. |
||
| + | Defeating the Warlock will complete the "Saved by the king" achievement. |
||
| − | Disciples will spawn in the doorway to the right. (This is the best spot to get the "I call it a Hawking Hole" achievement by the way!) After destroying [[The Machine]], the [[Warlock]] boss himself will approach you. He is just like the regular Disciples, just with a few more lightning spells. After you defeat him a cutscene will start and [[The King]] will do it Star Wars style. |
||
| + | |} |
||
| + | As you are about to kill the Warlock, he will teleport to the throne to cast a massive lightning spell. Unfortunately for him, [[The King]] will finish him off Star Wars style. And with this, the chapter is complete! |
||
| − | And with this the level is complete! |
||
{{WalkthroughNav}} |
{{WalkthroughNav}} |
||
| + | {{DEFAULTSORT:Chapter 04 (Magicka)}} |
||
| − | [[Category:Walkthrough |
+ | [[Category:Walkthrough (Magicka)]] |
[[Category:Strategies]] |
[[Category:Strategies]] |
||
Latest revision as of 02:52, 30 July 2020
Checklists[ | ]
These are listed in order of game appearance.
For visual support, refer to this video: http://www.youtube.com/watch?v=TFREIFYBT2I
Achievements[ | ]

|
King's Quest
|

|
Sherlock Holmes |

|
I call it a Hawking Hole |

|
Saved by the king |
Magicks[ | ]

|
I put on my robe and wizard hat
|
Items[ | ]
- Staves
- Shield Staff (Increase the rate at which shields are boosted/Immediately cast a self shield) - Inside the closet beside the door of your inn room as you wake to the town falling under siege in Area 2.
- Staff of War (Physical Resistance Aura, Doubles HP/Arcane Bolt) - Dropped from a Disciple in the market in Area 3, or from the Disciples during The Machine boss encounter in Area 7.
- Weapons
- Mjölner (Medium Physical/Slow, Lightning strikes target on hit) - Hanging above the second door on the left as if it were a sign in Havindr just after entering the city in Area 1.
- Captain's Axe (Medium Physical) - Dropped by Admiral Agnar if you murder him just before entering the inn in Area 1, or if you murder him again in the market in Area 3.
- Warhammer (Medium Physical/Pushes target back) - See Secret 6/14 above.
- Gungnir (Medium Physical/Slow, ranged, armor piercing) - Propped against a market stall on the northwest side of the market in Area 3.
- Blade of Chill (Medium Physical and Cold/Slow, creates a cold blast in front of wielder) - Left of where the Town Grinder breaks through a wall, behind a fire and pile of debris in Area 5.
Monsters and Bosses[ | ]
- Goblin Rogue (Pirate version)
- Goblin Bomber
- Orc Scout
- Disciple
- Orc Berserker
- Orc Warrior
- The Machine and the Warlock (Boss)
Chapter Story[ | ]
Chapter 4 - A New Hope
Saving the village of Dunderhaed earned the wizards a carriage ride to Havindr, where the good king awaited them at the end of their journey. And just as they reached the city gates, the first snowflakes fell.
Area 1[ | ]
Finally made it Havindr! Head west off the road immediately where you will you see yet another crashed airship. The Tornado magick is hidden amongst the trees next to the southern side of the ship. Continue north after picking it up, but turn left at the fork instead of going straight to the gate. To the north of the airship is another dead moose (Moose 5). What's up with all these dead mooses? Er... moose? Meese?
Now go back to the gates to trigger a short cutscene of the city gates opening. Enter the city. If you talk to the first person inside the city, he tells you that he saw a tall pale man with long black hair walk out of the wreckage unscathed. Hmmm... Who can that be? Don't worry about checking any of the doors, they are all locked. But there is one building near the city gates with a sign that looks like a hanging hammer (next to a woman in blue); it turns out that the hammer is actually Mjölner so grab it if you want it!
Then just continue following the road north until you trigger a cutscene where Admiral Agnar along with a troop of soldiers runs over to meet you. He says that The King cannot meet you today and advises you to rest in the inn next to him. Walk into the open inn door since you can do little else. Well, I suppose you could murder Admiral Agnar if you really want a Captain's Axe.
Area 2[ | ]
While you are resting, a meteor crashes into the inn and wrecks part of your room.
When you regain control, open the cabinet next to the exit to get the Shield Staff (which allows you to boost shields faster or cast a self shield immediately), then toss the staff because it is not very useful, then head out and let the battle begin!

Area 3[ | ]
Once outside the inn, head east to the bridge killing the Goblin Rogues and Goblin Bombers on the way. Once you get to the bridge you will meet a new enemy, the Orc Scout. The Orc Scout is stronger than the average goblin, but it's nothing to fret over. They have a special ability to latch onto you and start biting you, so be sure to spam the key you bound to Boost to break free. The Orc Scout also has an interesting behavior: they shake themselves dry like a dog if they get wet.
Fight off the waves of enemies at the bridge, then head east to trigger a cutscene. A familiar figure in a black cloak appears and warns you about enemy warlocks ahead. Right after this, head north at the fork in the road to reach a secret area (Secret 6) with a Warhammer. Return to the fork and head east to market. Admiral Agnar is there and yells "IT'S A TARP" before waves of Orc Scouts, Goblin Rogues and Goblin Bombers attack. Before the final wave, a Disciple makes a grand entry.
Disciples are resistant to physical damage (there's a white aura around their feet) because of the Staff of War they are holding and they have the following attacks:
- Shoots Arcane beams (
 ).
). - Shoots Life bolts (+) to heal nearby allies
- Shoots Water bolts (+) like the Druids to do an area knockback.
- Shield themselves constantly with .
Pick up the Staff of War dropped by the Disciple after the battle ends. It doubles your max HP and gives you physical resistance, very good for the solo player. Other objects of interest include the Captain's Axe dropped by the dead Admiral Agnar and a Gungnir propped against a market stall on the northwest side. Gungnir is a ranged throwing spear.
Continue east to the next area.
Area 4[ | ]
Douse the fires blocking your way with water spells or Rain. Continue eastward and you will trigger a cutscene. A Town Grinder crashes through the northern wall and the three soldiers yell "FREEEEEDOM!" (watched Braveheart?) and suicide themselves on the whirling blades. After this, go up and around the debris you had just doused to the left to get the Blade of Chill laying against the side of the building.
You will encounter a new type of orc here called the Orc Berserker. The Orc Berserker loves to do a leaping attack at you to close large distances and the attack knocks you down, so be careful when you see these and try to take them out quickly to stop them from interrupting your spells.
As a fun alternative to damage spells, knockback spells such as ![]() can be used to great effect here by pushing enemy orcs into the whirling blades. If the orcs are successfully pushed into the blades they will be diced into gibbets instantly. Be careful, however, as Orc Berserkers are more resistant to knockback than previous enemies and will only be pushed with multiple
can be used to great effect here by pushing enemy orcs into the whirling blades. If the orcs are successfully pushed into the blades they will be diced into gibbets instantly. Be careful, however, as Orc Berserkers are more resistant to knockback than previous enemies and will only be pushed with multiple ![]() elements in the same spell.
elements in the same spell.
Continue east, dousing more fires as you go along. Eventually you will reach a large block in the road. Go into the open building above you to go around.
Area 5[ | ]
Douse fires as you progress through the building. You will eventually come across the Conflagration Magick. However, once you get near this Magick, your first Orc Warrior will spawn at the nearby doorway. These guys have lots of health, are armored, and do a charge attack.

When you've taken care of him, head east and out of the door on the south side of the building, taking out the additional Orc Scouts inside if you so choose. Then head east to move to the next area.
Area 6[ | ]
Head northeast and you will find a group of goblins and orcs with Goblin Bombers interspersed; this is a great time to try out your new Conflagration Magick if you want!
Continue heading northeast, fighting orcs along the way until you get to the checkpoint. Moving forward from here, the guards inform you that the orcs have captured The King and barricaded the door to his castle. The good news is, they have decided to use the gunpowder shipment you delivered to blow up the door. The bad news? The fuse takes 3 minutes to burn. Waves and waves of all the enemies you have seen in this chapter will continually come in from the sides to assault you.
You have four options:
- Choose to attack profusely while you wait for 3 minutes;
- Choose to heal your friendly NPCs while you wait for 3 minutes;
- Cast an AoE shield and keep boosting it for 3 minutes;
- Or detonate the charges instantly by casting a fire spell on it (the base of the door).
When your bloodlust is satisfied, enter the building to move to the next area, the King's Hall, and your next boss fight. The waves of enemies do not stop spawning.
Area 7[ | ]
As you enter the room, you will be confronted by a scene where The King is about to be drilled to death.
|
The Machine and the Warlock
The Machine is a wooden contraption with a drill designed to torture The King. It is operated by an orc pedaling a bicycle on its platform to advance the position of the drill. You need to kill the orc before the drill kills The King. During the fight, two Disciples will enter from the doorway in the northeast. If you kill either or both of them, more Disciples come through the door to keep the number of Disciples at two. Use any means you like to damage the orc on The Machine while dodging the two Disciples. Some methods are:
You have two minutes to destroy The Machine before it kills The King.
An effective way to defeat the Warlock is to hide behind The Machine on the left, wait for them to run around the corner to you, cast an area stun ( Defeating the Warlock will complete the "Saved by the king" achievement. | ||||||||||||||||||||||||||||||||
As you are about to kill the Warlock, he will teleport to the throne to cast a massive lightning spell. Unfortunately for him, The King will finish him off Star Wars style. And with this, the chapter is complete!
| |||||||||||