Checklists
These are listed in order of game appearance.
For visual support, refer to this video: http://www.youtube.com/watch?v=oLtevE8xBOg
Achievements
- Secret 11/14 (Sherlock Holmes Achievement) - Sceptre of the Troll King - After the battle with the summoned Wights and Zombies in the graveyard, head west into the tomb instead of through the locked door you destroyed in Area 2.
- Moose 9/12 (King's Quest Achievement) - On the mantle of the fireplace in the first room of the Count's castle in Area 6.
- Play it again, Vlad - Defeat Vlad at the end of the chapter in Area 7.
Magicks
- Raise Dead 14/21 - On the floor after defeating the Necromancers in the church in Area 3.
- Fear 15/21 - On a bookshelf next to the fireplace in the first room of the Count's castle on the left in Area 6.
- Charm 16/21 - Leaning on the wooden furniture next to the couches in the first room of the Count's castle on the right in Area 6.
Items
- Staves
- Sceptre of the Troll King (Makes enemies less likely to attack the wielder/Charm target) - See Secret 11/14 above.
- Staff of the Dead (When a nearby player dies due to friendly damage not caused by you, they will automatically be revived. Also revives friendly zombies) - Drops from Necromancers in Area 3 and 4.
- Staff of Life - In the eastern side of the human village to be healed in Area 5.
- Weapons
- Cursed Blade (Medium Physical and Poison/Slow, Poisons on hit) - Drops from Wights in Area 2, 3 and 4.
- Morgul Blade (Low Physical/Poison) - Drops from one of the three Necromancers in the Church fight in Area 3.
Monsters and Bosses
- Ghoul - Moves relatively fast
- Lantern Ghoul - These are ghouls carrying a lantern that explode with fire damage after they die
- Traeskmonstír - The "Swamp Thing" ent.
- Zombie - Move quite slowly
- Skeleton Soldier - Skeleton waving a sword
- Wight - Armored skeleton soldier wielding a red shield and a Cursed Blade
- Necromancer - Casts poison on players
- Skeleton - Wights turn into Skeletons in Area 3 after the Necromancers die. These throw bones at you from range or try to melee you
- Vlad the Vampire (Boss)
Chapter Story
Chapter 9 - Symphony of the Twilight
Emerging from the mines, after destroying the goblin civilization, the wizards set upon a new objective -- they should find the Count, who would bring them to Fafnir. As the mist rose from the murky water, the odor of death sent chills running down their spines! Without Vlad's reassuring presence, they were all alone -- and afraid.
Area 1
Welcome to Myrkur Swamp! Future Vlad appears and informs you that the swamp is full of the undead but you must travel through it to reach the Count.
Going north, some Ghouls start to attack you, dispatch them and move on to a clearing with a broken wheelbarrow in the middle of it. A Traeskmonstír (a swamp-like ent) spawns out of the ground and will grab you in its arms if it is near. Kill it with the usual ![]()
![]()
![]()
![]()
![]() beam attack. Once it is dead, continue to the checkpoint in the east.
beam attack. Once it is dead, continue to the checkpoint in the east.
When you pass by the river, a few Zombies will spawn out of the watery depths. They will try to grab you or bite you, causing poison. Dispatch them, move north, and dispatch even more Zombie waves. Teleport across the river with the broken bridge (or freeze the river), kill more Zombies and Ghouls, and you will eventually reach another clearing. A Necromancer summons a group of Skeleton Soldiers before running off. Kill the skeletons and go north.
Area 2
Cross the bridge and kill the Ghouls and two Traeskmonstírs (you can freeze stun them first). Cross the bridge to the northwest to reach another checkpoint. Another cutscene follows with the mysterious Necromancer entering a church, but not before summoning four Wights. Kill the horde of Zombies approaching from the east first as the Wights move extremely slowly. After that, kill the four Wights with long distance spells, and destroy the lock on the church door. Wights will drop a Cursed Blade when they die.
Before entering the church, look to the west edge and you will see an entrance to a tomb. Enter the tomb to find another secret containing the Sceptre of the Troll King. (You cannot enter the tomb while the hp bar for the lock is still on the screen, destroy the lock first.)
Area 3 - Church
Once inside the Church, a fight with three Necromancers and several Wights ensues. Necromancers are not really threatening as they do the following:
- Poison spray (Poison Elementx3)
- Poison bomb (Poison Element +
 )
) - Arcane Earthquake (+Area)
- Chain Lightning () - May kill themselves with it if they are wet
- Remove Wet (+Self)
- Revives anything that dies within their staff radius due to the Staff of the Dead they are holding
Some Ghouls and a Lantern Ghoul will enter through a side window in the northwest mid-fight as well. Be careful as the Lantern Wight will explode with Fire when it dies. If you use Lightning spells to kill the Wights, their armor and weapon sometimes get destroyed instead and become normal Skeletons. The Wights will all turn into normal Skeletons when all the Necromancers die. These Skeletons are worse than the standard Skeleton Soldier, they only throw bones at you or poke at you with their bony fingers. The solution to this fight? You guessed it, the usual ![]()
![]()
![]()
![]()
![]() +Area spam.
+Area spam.
Pick up the Raise Dead magick on the floor once the dust settles, decide if you want to use the Morgul Blade left behind by one of the Necromancers (probably not if you want to keep Gram) and look at what the Staff of the Dead does. The description isn't very good, what it does is that if something dies within the yellow radius, it gets revived automatically. Once you are done, leave by the east exit.
Area 2
Once you exit the Church, you will return to Area 2, but you will be on the eastern side of the building. If you try to enter the Church by the front door again, none of the items you left behind on the floor will be available. Head east from the Church and Future Vlad will appear again to tell you that the Count's village is up ahead. Continue east.
Area 4
You arrive outside the remains of a farming village filled with undead... Initially, you will see Ghouls, Lantern Ghouls and Zombies, but as you continue eastward, you will also encounter Skeleton Soldiers and a Necromancer. When you reach the end of the undead village, a Traeskmonstír will attack. Tread carefully from this point onwards because there are more Traeskmonstírs up ahead and the area is filled with water puddles and lakes where you can get wet easily or drown if you are not careful.
When you encounter 2 Traeskmonstírs simultaeneously, back up and kill them with long range beam spells. It will start to "rain" but nothing will actually get wet, it is not actual rain. Continue heading eastwards, deal with another Ghoul ambush and exit the area.
Area 5 - Village
As you enter this area, Future Vlad appears yet again and informs you that the Count will only speak to people of his village and thus you must gain the trust of the villagers. Walk northwards into the village. If you chat with the villagers, you will note that they are sick and tell you that the Count can do little for them. There is a Staff of Life in the extreme eastern part of the village.
Head north across the bridge to the Count's castle and Future Vlad will appear once again to tell you that perhaps the villagers will help you arrange a meeting with the Count if you heal them. So, go back and heal all the villagers to full health with any healing spell to start a cutscene which opens the doors to the Count's castle.
If you instead kill any villager, you lose the trust of the villagers. Head north to the castle doors and Vlad will portal you back in time a few minutes to just prior to your arrival to the village to try again.
Area 6 - Count's Castle
After entering the castle, pick up the Fear magick on the left on the shelf, and look at the moose (Moose 9) on the mantle of the fireplace next to you. Cross to the other side of the room and pick up the Charm magick half obscured by the wooden furniture near the red couches.
Go up the stairs to trigger another cutscene where Future Vlad appears to tell you that he cannot enter the next room where the Count's chambers are but does not explain why. Enter the Count's chambers.
Area 7 - Vlad
Move up the corridor and you will see the Count playing the organ. He turns out to be Present Vlad. He is extremely angry that you have followed him to his castle. Before he kills you, he reveals a dreadful secret... He is a vampire!
|
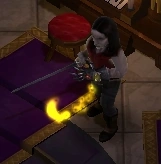
Vlad the Vampire
The fight takes place in a round chamber with a hallway attached to it. Vlad is rather fast with his sword and will suck out your life if he gets too close, as could be supposed of a vampire. But then again vampires are usually undead so give him Life ( One relaxing way to do so, is to move back to the hall way and block it with a simple shield. Vlad will start attacking the shield and you can heal the hell out of him. Preferably heal mines ( | ||||||||||||||||
When Vlad is about to be defeated, he portals you to Niflheim, the realm of the dead.
| |||||||||||